Showing posts with label DIY. Show all posts

Monday, May 28, 2012

Frugal Father's Day

I am so excited. In two and a half months I am going on a trip of a lifetime. I am so lucky to be saying that I will be partaking on an adventure to, what I consider to be the mother country, Ireland! I am also going to spend five days in London as well. I am even luckier because I will get to share this experience with my loving parents, sister, and husband. I am beyond excited! Now, with my departure date looming closer and closer, my purse strings appear to be getting tighter and tighter. I just know that when I’m doing my thing (aka shopping!) in the UK, I’ll totally regret it if I don’t save up enough money to really go for the gusto…I mean, come on, it’s Europe! Did I mention that I’m excited?!?
So, my husband and I have come up with a pact, cutting out a bit of the unnecessaries where we can. One place we decided to skim on this year was gift-giving to each other. He is already famous for saying, “I don’t need any gifts” (don’t you just hate that?) so I told him that, this year, I would carbon copy my mother’s day to his father’s day. I had an awesome mother’s day, of course, and even though it was gift-free I got plenty of the real gifts that matter in life – little kisses, big hugs, works of art from my three year old and a lazy day with my favorite people in the whole entire world.
Now, with Father’s Day coming up, it’s up to me to be creative – without spending much/anything. Haha…jokes on him, I have Pinterest! I’m totally going to rock it.
In our family it’s funny because Mother’s Day usually centers on breakfast and Father’s Day centers around supper…and the BBQ. So my plans for a Frugal Father’s Day are going to break down to this:
1. Awesome supper with plenty of hearty man-food.
2. Adorable handmade crafts from the kids and
3. A spin on an old classic, as a gift from yours truly.
Let’s just say that I’m doing a carbon copy of mother’s day but I’m putting some glitter and awesome dust on it too.
Food
This should be a fairly easy thing to come up with. What are his favorites? For my husband, he has a major sweet tooth for Reece peanut butter cups so I’m pretty sure that this Reece’s Cheesecake Brownies would be a huge hit.
Check out Pinterest...you can pretty much find a cake, cupcake, bar, or cookie inspired by any and every chocolate bar known to man kind! I think a few of these would go over quite nicely as well (click on the picture to be taken to the recipe):
BBQ Chicken Pizza
Beer-battered Pickles

Buffalo Chicken Potato Skins
Décor
I LOVE this tie themed banner and flag set, available for free download at Amanda’s Parties to Go! It doesn’t take much to sneak downstairs after everyone’s gone to bed (or before they wake up) and put up a little pizzazz to wow them in the morning!


Gift Options from the kids
I love this Father’s Day survey from The Creative Homemaker! My three year old comes up with the most hilarious stuff so I would love to sit down with her one night and fill this out. Plus there’s lots of white space for her to “decorate” it afterwards. It’s a nice idea to do one of these every year and then bind them together in a scrapbook!
Here’s another idea from Kinderpendent that you could do with your little one…create a quotation book to chronicle all those adorable things your kids say. You can dress it up with a bit of cardstock, ribbon, etc. This would definitely be a book to cherish for years to come – just make sure you leave some blank space for those gems that are yet to come!
I have been seeing these bookmarks a lot lately on Pinterest and have been waiting for a chance to make one. How cute are they and think of all the fun you’ll have making them with your kids (check out this link for more info)!
Gift from Wifey
So, when we agreed to not buy any gifts for each other this year I knew that I was still going to make him something. When I thought about it, I came up with something that would be perfect. A coupon book. Yes, just like we use to make when we were little BUT this time, it’s going to be filled with some very important coupons (in a parent’s world anyways!). Example, what does my husband really hate doing? Hmmm…how about: get out of one poopy diaper, one foot rub while we watch the sports channel, one sleep in until the time of your choosing, and so on and so forth (if you’re really brave you could include a “blank cheque” one too!). What is really important to him…or what are one of those annoying daily life tasks that he can get out of. Yes, it’s more elbow grease from you but, personally, I’ll be happy when I’m trying on a pair of new shoes at Harrods in London that I couponed my way out of this one! Check out Martha Stewart.com for an awesome Father’s Day coupon book template.
With a little creativity and a lot of heart you can make a wonderful Father’s Day. It really is the thought that counts and I think that putting in the effort is worth so much more than anything you could buy in the store!
Here’s a little poem that I want to include in my hubby’s card – he always makes me cry with those cheesy box store cards…let’s see how he holds up to this, handwritten by my daughter!

Wednesday, May 9, 2012

Chocolate Covered Wow Factor (in no time flat!)

Today, sadly, my daughter had her last music class.  I say sadly because the whole experience with this program has been so positive.  She has learned a lot, met new friends, and even got to showcase what she learned earlier in the month, when the kids were part of an adorable play (the Three Piggy Opera).  I've loved going to the class with her and sitting with a group of moms while we waited for the kids (the teacher was absolutely awesome too); we were a group that really jived together well and I'm sort of sad that our weekly meetings have now come to an end!  Of course we have exchanged numbers with promises of play dates and I really hope that we follow through and continue meet up every once in a while in the future.
Because it was the last class, we had a recital of sorts, where the kids sang little solos and "played" the piano to various songs.  I was proud of Scarlett, who did so awesome!
We all brought some treats for after the performances, I opted to make some chocolate covered brownie bites.
I wanted to share this with you because they were so yummy, so easy to make, and they give off a great wow factor!  As you know, I'm back at work full time, so I don't have a lot of extra time to be baking things in the middle of the work week.  These, however, were perfect for me and my tight schedule.

Here's how you can make some of your own:
1. Bake a pan of brownies (from a box is even better because it is so very quick - you don't even need to pull out your mixer, just hand mix the ingredients). 
2. After they've cooled, break up the brownies into a bowl and then form them into balls (rolling them with your hands).
3.I put the sticks in at this point (which I bought at Micheal's craft store) and then put them in the freezer for 15 minutes to set.
4.I melted some Wilton Melts chocolate in the microwave (according the the package instructions) and then dipped my brownie bits.
 5.Apply your sprinkles of choice and let the chocolate harden on a piece of wax paper (approximately 20 minutes).
6.I tied ribbons onto each stick for a little extra whoomp!
They were perfect and quick.  The brownies are soooo very moist and very yummy.  I love these because you can change up the colour of the chocolate or sprinkles to match your own party's theme.  And, it looks like you've created something amazing - which you have - but no one needs to know you whipped it up like nothing! ;)
Like I said, we love our music teacher and I only hope that we are lucky enough to be in one of her classes again in the future.  We brought her a little gift - Scarlett coloured her a picture (lol - a self portrait!) and then I went to an amazing chocolate boutique I know of (one of the benefits of working downtown!) and got her some uberly delicious chocolate coconut disks and butter crunch.  I made a little tag for the chocolates, which was a picture of a lollipop with the words "you are so sweet" on it.
I know that as my kids get older, and are involved in the various different activities they will undoubtedly be a part of, I will meet a lot of different parents and teachers/coaches/instructors, etc.  If every experience parallels this one, I will be very happy, and will make a lot of friends along the way!

Tuesday, April 24, 2012

How does your Garden Grow...

Yesterday I started a new project - something that I've always dreamt of doing.  Lack of knowledge, time, and space has always prevented me from actually going through with this little plan but I figured it's now or never so I took the plunge. 
I went with my girls to a local garden centre, picked out several seed packages - after some research into which varieties were best for my climate - soil, and some cute Martha Stewart gardening tools (okay, so the tools were purchased on a whim but they are turquoise and brown and very fabulous looking).
Very excitedly, we came home and laid out our new treasures in front of us.  I had seen on pinterest a few weeks back that you can save your empty toilet paper rolls and use them as seedling cups (click HERE to see the article), so I also had a big bag of cardboard rolls.  Apparently they can go right into the soil when you're ready to transplant them into your actual garden and the cardboard is biodegradable.
I found out that I had to start a few of my seeds indoors and a few of my seeds outdoors, after some reading and some very good advice from a domestic guru at Schnitzel and Boo.  So, after putting the baby down for her nap (nightmare trying to work with dirt and minuscule seeds when a one year old is climbing all over everything!) we got started.
The in-door seeds that we started were zucchini, onions, tomatoes, and thyme.  To start later, outside, we have strawberries, carrots, garlic, peas, dill, green onions, and potatoes.  Now, I'm the farthest thing you can be from an expert so I hope this is right - I guess we'll see with time! :)
We got all our seeds into the cardboard cups, marked them and put them inside on our lovely Ikea seed table.  First thing this morning my daughter ran downstairs to check out the "baby seeds" and she was pretty disappointed to find nothing more than our wet seedling cups just sitting there.  I assured her with some time and sun and love they would be growing soon (inside I thought to myself, "I hope!").
Seeing that this is my first garden and that it is becoming a family affair (the mister is going to build me a 8 foot by 4 foot raised garden bed) I will post updates on how it is making out.  What would success look like to me with this little project?  Well, right now, I hoping that the seeds actually grow and to be able to transplant them outside; I would love to see something - anything - out in terms of actual veggies so that the girls can see how a seed turns into real food!  I think, most definitely, the time we spend together, having fun working outside on our project will be a major win as well!
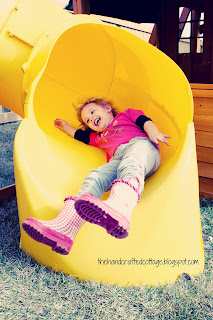
**Such a nice day yesterday we had some fun in the playhouse too - yes, when I go down the slide it's a scary sight!! :)

Monday, April 23, 2012

Milk and Cookies First Birthday

In a few short days, my baby is turning one!  I can't believe it.  This past year has gone by with alarming quickness and now, before I know it, my baby isn't so much of a baby anymore!
We ended up having to have her birthday party this past weekend because my mother-in-law would be away during her real birthday.  Also, since I will be going back to work next week (boo-urns), it was nice to get the big festivities out of the way before my first day back - cut down on the chaos!
I, as most pinners do, have a crazy obsession with Pinterest and therefore started there to chose a birthday party theme.  There are so many great ideas on this amazing website but as soon as I saw some Milk & Cookies party pics I knew this was the winner!
So started a few weeks in advance and made nine different types of cookies; my goal was to make ten different batches but by the ninth one I was done!  Sugar cookies (family recipe), gingersnaps (family recipe), coconut macaroons (Joy of Baking), chocolate chip (family recipe), oatmeal raisin (Aristocrafty), Oreo pops (Hip Hip Horray Blog), minty s'more cookies (Tip Junky), pinwheels (from Schnitzel and boo), and chocolate chip cookiedough cheesecake bars (Brady's Baking) were on the menu.  I also prepared a milk bar that offered skim, 1%, 2%, and homogenized milk, along with chocolate, rolo, and strawberry syrups for flavoring.
For decor I tried to keep things as INEXPENSIVE as possible!  For the table I used a tablecloth I already had and then went to the Dollar Store and got the thin pink and white plastic table covers , which I taped to the front and laid along the back of the table.  I bought the pink sparkly O,N,E from Walmart for $2 each.  I used different platters I already owned and then for the Oreo pops, I bought some foam and covered it with paper and ribbon.  I place it on top of a coffee cup and voila - a cake pop stand!  I also went to Home Depot and bought some ceramic tiles (the edge pieces) and made them into my cookie markers - they work perfectly with a dry erase marker!
For the milk bar I went to IKEA and bought six large glass bottles for $2.99 each.  I used some ribbon and chalk decals from Uppercase Living to decorate.  The smaller milk bottles I purchased on-line and simply added a ribbon to make them pop.  The amazing paper straws (they did not get mushy at all in the milk) were purchased from an Etsy shop called Hey Yo Yo.  I also used a large chalk decal for the milk bar sign, which I put on board I bought from Home Depot for $6.
Here's a picture of me with the birthday girl!  We ended up just have one cupcake for her to smash into, rather than a full cake.  There were so many cookies I'm glad I decided not to add more sweets in the end.  She had an awesome time and we were so happy to spend the afternoon with family that we do not always get to see. 

Happy birthday Miss Kate, I love you more than I can say.  You are such a sweetie and I'm so very proud to call myself your mom.  xxoo